Step 1: Access the Control Panel
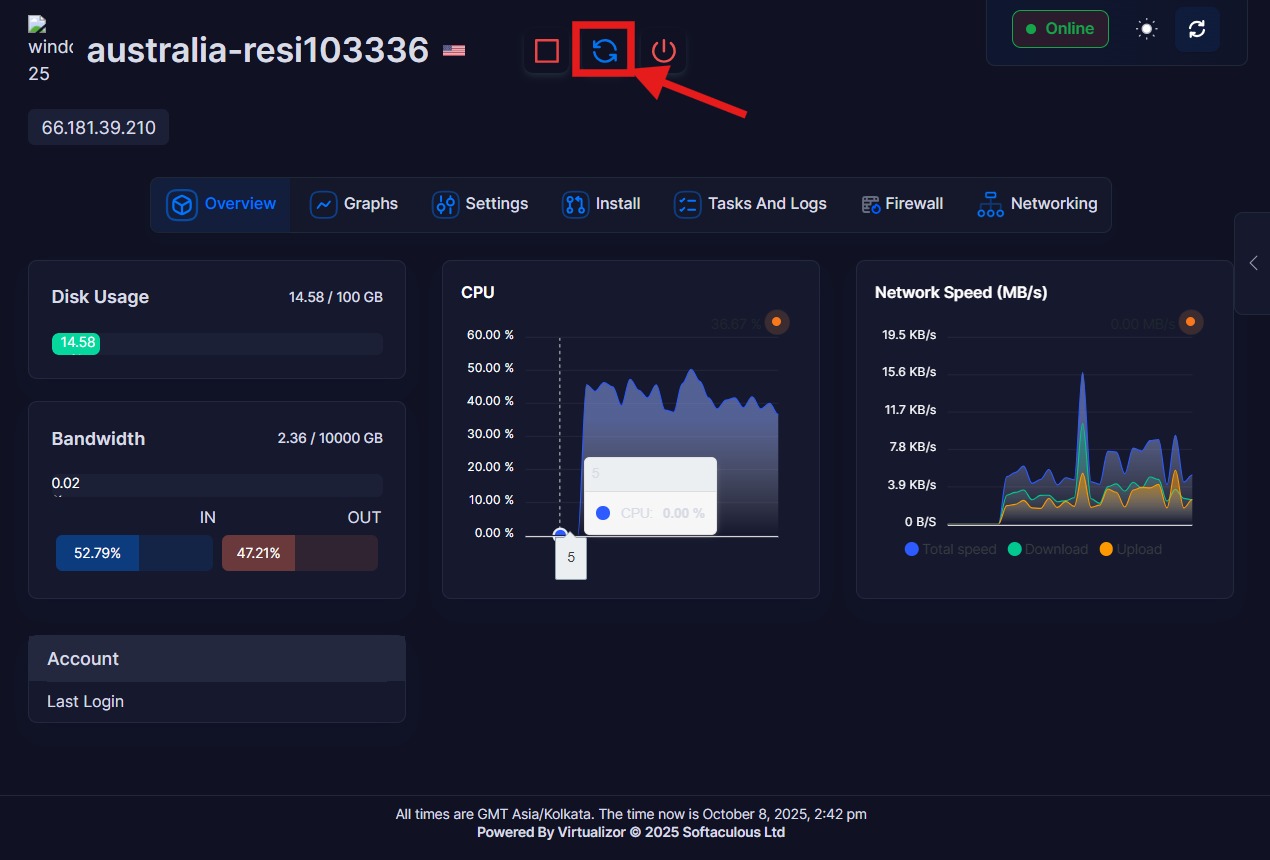
Open the VPS control panel URL and sign in using your existing credentials. Upon successful login, you should be directed to a dashboard, as illustrated, with the IP address displayed in the top-left corner.
Step 2: Open the Settings Tab
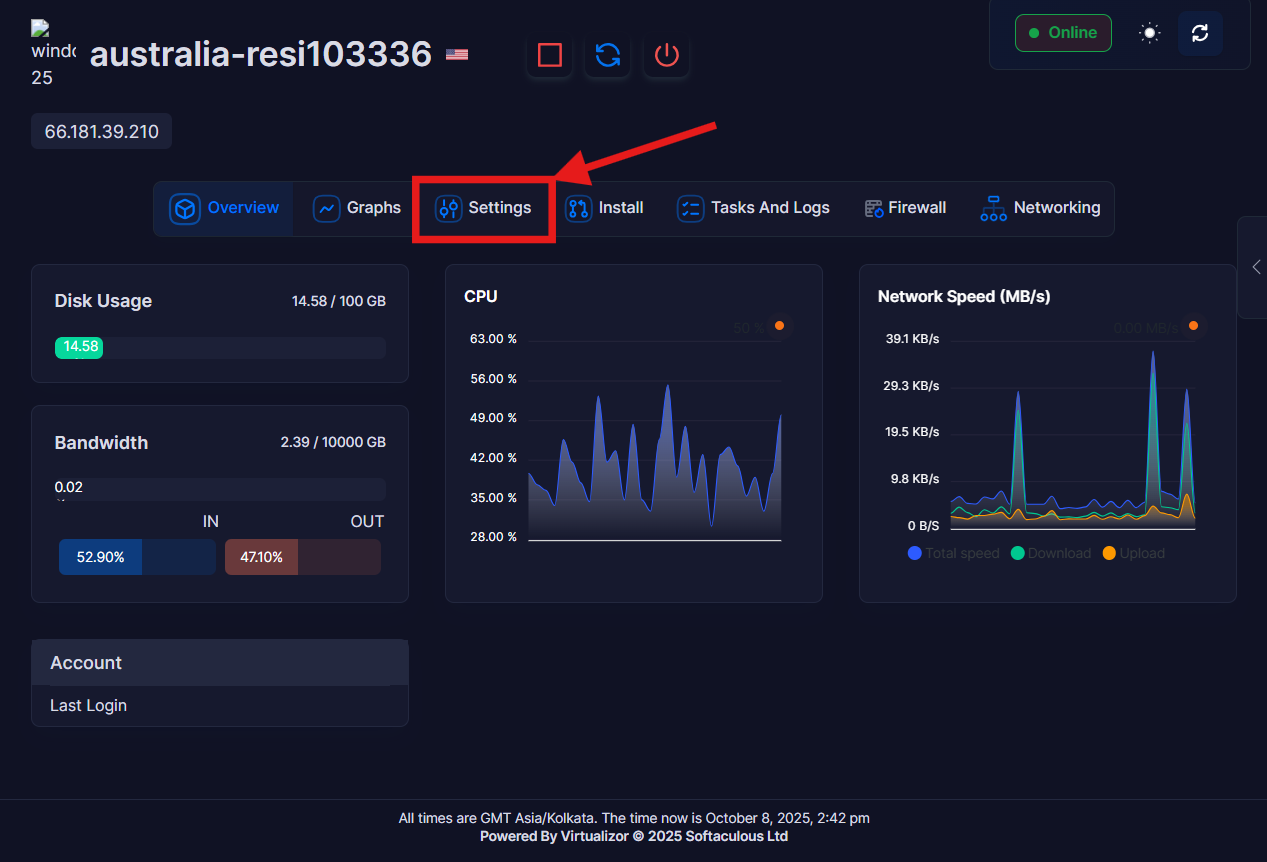
On the top horizontal menu of the panel, you will find options such as Overview, Graphs, Settings, Install, etc.
Please click on "Settings".
Step 3: Navigating to "Change Password"
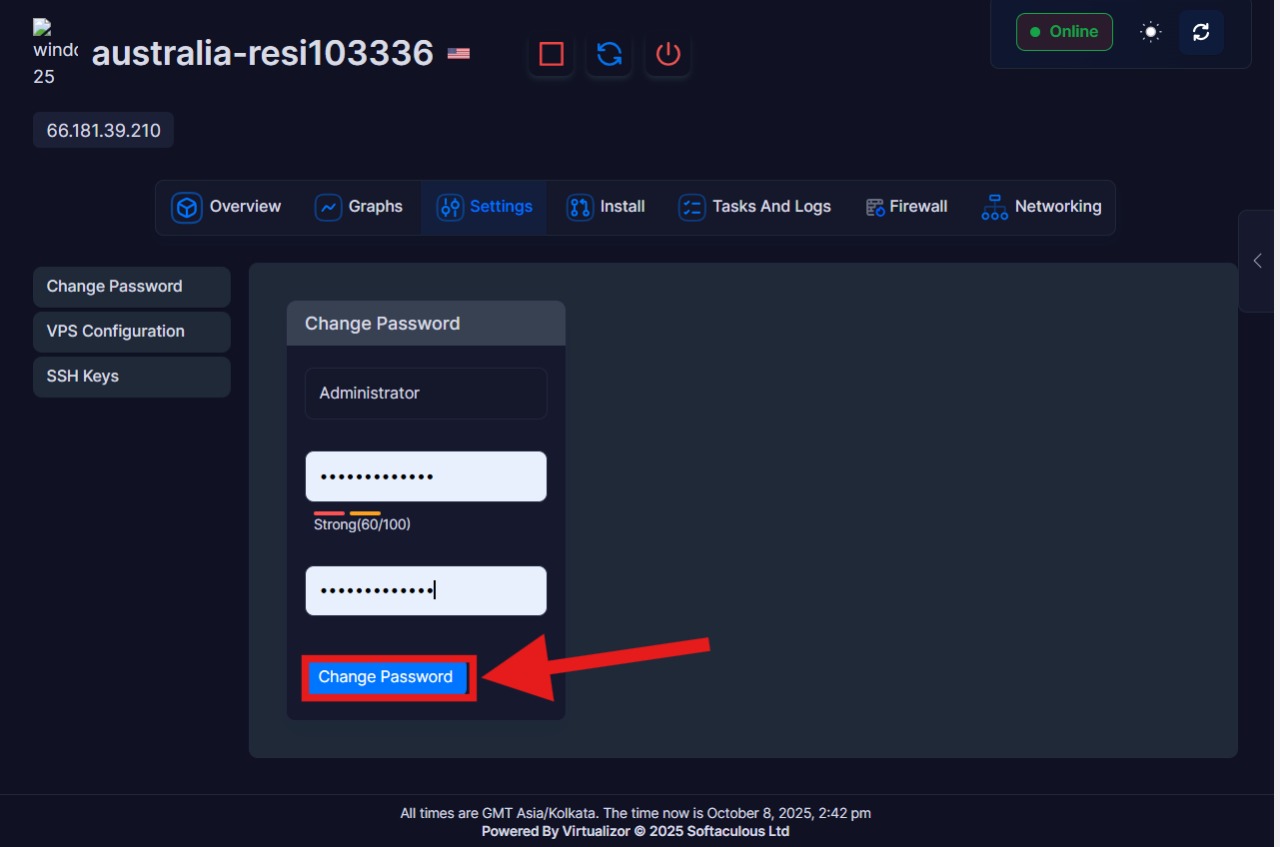
Within the Settings page, navigate to the "Change Password" option. A vertical menu on the left-hand side provides the following options: Change Password, VPS Configuration, and SSH Keys. Please select "Change Password" from this menu, as shown in the screenshot below.

Step 4: Inputting the New Password
Within the central panel, you will find a form labeled "Change Password."
This form typically displays the account (e.g., Administrator). Below this, you will find two fields:
-
"New password"
-
"Confirm / Retype new password"
Please enter the desired new password into the "New password" field.
Subsequently, in the "Confirm" field, please re-enter the same password precisely.
Ensure that the entries in both fields are identical. The system will prevent continuation if discrepancies are detected.
Once both fields match, please click the "Change Password" button located at the bottom of the form.
Please allow a few seconds for processing. A success message (or page reload) should appear to confirm the update.
Step 5: Restart the server
As the final step, please restart your VPS (Virtual Private Server). Utilize the "Reboot" button to initiate the restart process. This action will finalize the password modification and activate the new credentials for login purposes. Upon completion of the reboot and confirmation of the VPS's online status, you may proceed with logging in using your newly established password.